Lesson Plans for Elementary School Students
Art Lesson Plan: 12 Christmas Ornaments
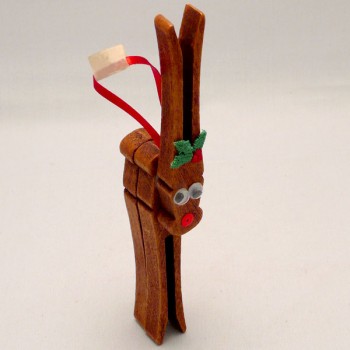
#1 Clothespin Rudolph Ornament:
Materials for each reindeer ornament:
- 3 old-fashioned clothespins
- 6″ piece of 1/4″ wide red ribbon
- decorative cloth holly applique (craft or scrap booking store)
- 2 small googly eyes
- tiny red pompom for nose
Method:
- Glue two clothespins together for the legs, with the third clothespin upside down for the head and antlers.
- Glue on the holly applique on his forehead, two googly eyes in the middle of clothespin, with the small pompom at the bottom for the nose.
- Glue ribbon behind head and antler clothespin, balancing the ornament for hanging.
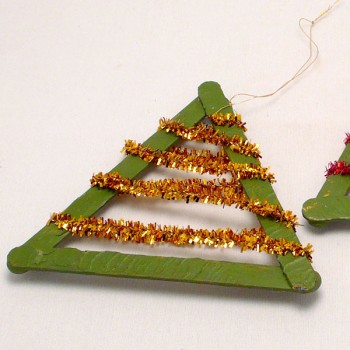
#2 Popsicle Stick Tree Ornament
Materials for each tree:
- 4 wooden popsicle sticks
- green paint
- one gold, silver, red, or blue pipe cleaner
- hanging cord or ribbon
- paintbrushes
- white glue
Method:
- Glue popsicle sticks into a triangle shape.
- You may have to break a popsicle stick into a length long enough to balance the triangle shape.
- Paint the tree green and let it dry.
- ‘Decorate’ the tree by bending the beginning of the pipe cleaner at the top, and zigzagging it down the tree, back and forth, hooking the end around the wooden tree.
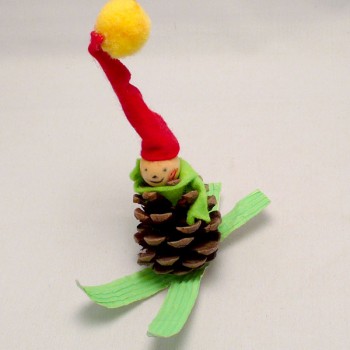
#3 Pine Cone Skiier Ornament
Materials for each skiier ornament:
- one pine cone
- one large pompom
- small but long triangle of red felt
- head ball (craft store, they come face painted on)
- small green piece of felt cut long and skinny in scarf shape
- two paper corrugated bulletin board paper, cut into 2 skiis
- white glue
Method:
- Cross skiis and glue together.
- Glue pine cone onto skiis.
- Glue head on top of pine cone.
- Glue scarf around head.
- Glue red triangle into long hat shape and glue on top of the ball head.
- Attach big yellow pompom by gluing on top of hat.
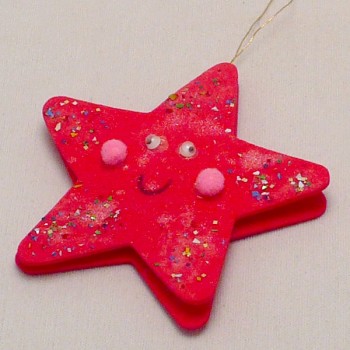
#4 Foam Star Ornament
Materials for each star:
- 2 foam stars
- 2 small googly eyes
- 2 small pink pompoms
- multi-colored glitter
- red fine-tipped marker
- glue gun and glue sticks
- ribbon or string hanger
- white glue
Method:
- Glue 2 stars together with glue gun (teacher can do this ahead of time if desired) attaching the hanger in between them.
- Students use white glue to add the eyes, cheek pompoms and glitter at the corners of the star.
- Use the red marker to add a cute little smile.
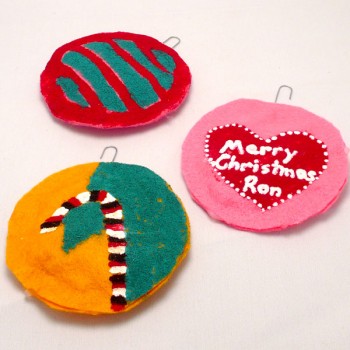
#5 Felt Ornaments
Materials for one ornament:
- 2 pieces of felt cut in circle shape
- scraps of felt for stuffing
- fabric paint (red, white, blue, black)
- paintbrushes
- tree ornament hook
- glue gun and glue sticks
Method:
- Teacher piles felt scraps in centre of one circle, puts ring of glue around outside edge of that circle, places a tree ornament hook at the top, then presses the second felt circle to that first circle (this makes the basic ornament).
- Student decorates with a Christmas greeting (Merry Christmas, or I Love You), or a candy cane hanging on a tree branch, or any design.
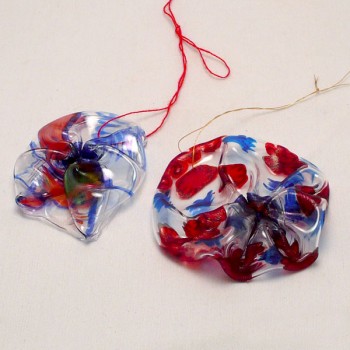
#6 Melted Plastic Cup Ornaments
Materials:
- plastic Solo drink cups
- permanent markers in red, blue, green
- ribbon or string hangers
- access to oven
- baking trays
Method:
- Students decorate plastic drinking cups with permanent markers. Any design will do. Try writing messages if you like, or drawing Christmas trees or wreaths and stars.
- Teacher places ornaments on tray at low temperature, watching until they shrivel down. This doesn’t take long. Let them cool.
- Attach hanging string.
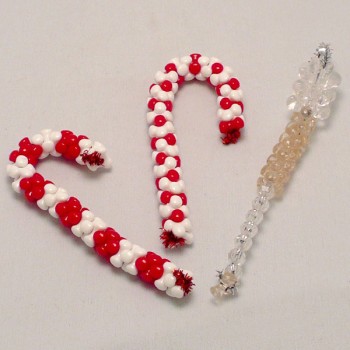
#7 Candy Canes and Icicle Ornaments
Materials:
- red or white or green pipecleaners
- Y-shaped beads that interlock (white and red ones) for candy canes and for the icicle: flower-shaped thin-finned beads 3-5 for the top and about 8 Y-shaped beads that interlock, then 7 faceted round beads for the bottom of the icicle.
- scissors
Method:
- For the candy canes, thread on the Y-shaped beads, 1 or 2 red, then white beads, alternating, bending down the pipe cleaner at the beginning and end of the threading.
- For the icicle, thread on the flower-shaped, 3-5 thin-finned beads, then the 8 Y-shaped beads, finishing with the 7 round faceted beads, remembering to bend the pipe cleaner at the beginning and at the end. Pipe cleaners will need to be cut to size.
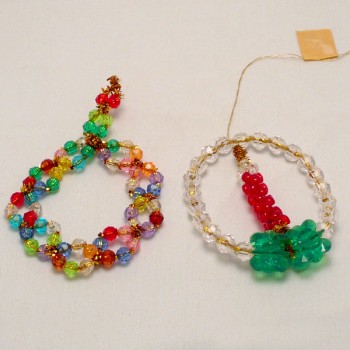
#8 Bead Wreath and Candle Ornaments
Materials for one wreath:
- multi-colored faceted round beads
- pipe cleaners, any color
- scissors
Method:
- Using 2 pipe cleaners, thread 3 beads on each pipe cleaner, then twist together making a small circle*, then thread on 3 more beads on each pipe cleaner, twisting again. Continue until you have made a small wreath.
- Twist the end of the pipe cleaners to the space between the 2nd and 3rd small circle (noted by a * above in #1.) This is the hanger at the top of the wreath.
Materials for one candle ornament:
- 22 clear faceted round beads for circle
- 10 red and 2 clear Y-shaped, interlocking beads for the candle and flame
- 6 green flower-shaped thin-finned beads for the green base of the candle
- pipe cleaner
- scissor
Method:
- Thread the clear round beads on a pipe cleaner. Don’t bend the ends yet.
- Add 3 of the green finned beads on each end, moving all the beads near one end, then twist the pipe cleaner together, making a circle at the end of one side of the pipe cleaner.
- Bend the remaining end of the pipe cleaner up into the center of the circle, then thread on the 10 red and 2 clear interlocking Y-beads making the candle.
- Twist the end of the pipe cleaner to make a flame. You can cut the pipe cleaner now or attach it to the top of the circle to keep the candle centered.
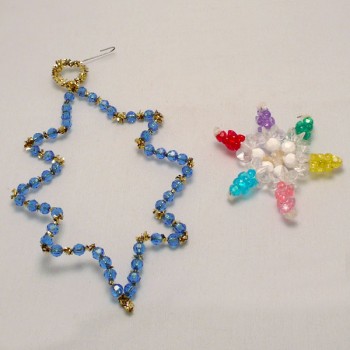
#9 Bead Star Ornaments
Materials for one ornament:
- Blue star: 48 round blue beads and 2 gold pipe cleaners
- Spoke star: 3 gold pipe cleaners, twisted together in the middle, making a 6-spoke wheel, variety of round beads, Y-shaped interlocking beads
Method:
- Blue Star shape: Twist pipe cleaner ends together at the top. Thread faceted round beads on each side, leaving some spaces between beads, bending pipe cleaner into star-shape, then twisting the 2 pipe cleaner sides together at the bottom.
- Star Spoke shape: Thread beads on spokes, starting with faceted white round beads, then thin-finned beads, followed by Y-shaped interlocking beads. Bend pipe cleaner over at the end of each spoke.
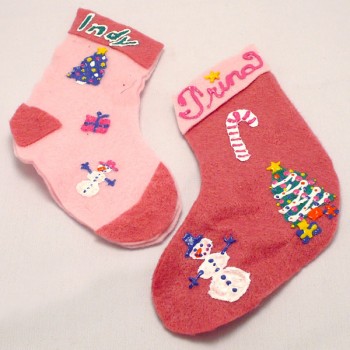
#10 Felt Stocking Ornaments
Materials:
- Felt material
- white glue
- fabric paints
Method:
- Cut out small stocking shape. Glue cuff and heel and toe patches.
- Decorate with fabric paint.
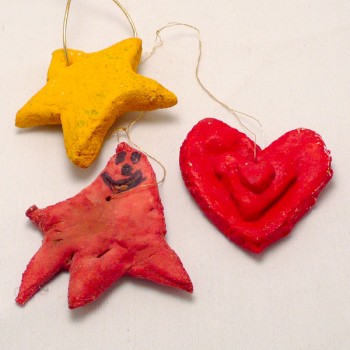
#11 Painted Clay Ornaments
Materials:
- Recipe: 1 cup flour, 1 cup salt, 1 rounded teaspoon of powdered alum, water, bowl, paint. Add water slowly. Knead till clay-like, model. Dry. Paint.
- Ribbon or string hanger
- tools (fork, plastic knives) and cookie cutters for imprinting designs
Method:
- Teacher makes dough with children.
- Students get a piece of dough and presses into original shape or uses cookie cutters or tools to imprint designs.
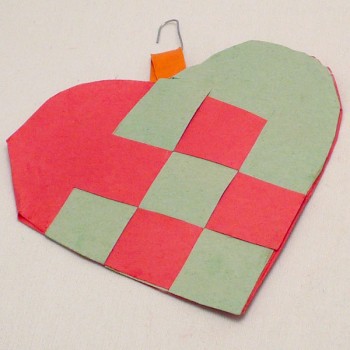
#12 Woven Heart Ornament
Material:
- red and green paper
- scissors
- white glue
- ribbon or paper hanger
Method:
- Fold red paper in half. Place a green piece of paper underneath. Cut out heart, leaving fold on left side. Put green heart aside.
- On red heart, on the top side, cut 3 strips diagonally from right side to left, cutting off the right part of the heart, but leaving a 1/4 percent uncut red at left side. Cut 3 diagonal strips in the green heart, cutting off the left side.
- Have students weave the green and red strips together. Attach a ribbon or paper hanger between the 2 sides then glue it in and also glue down the woven strips unto the solid red back of the heart.
Tags: christmas, decorations, ornaments
