Lesson Plans for Elementary School Students
Full Length Lesson Plans from an Elementary School Teacher
Art Lesson Plan: Picasso Portraits

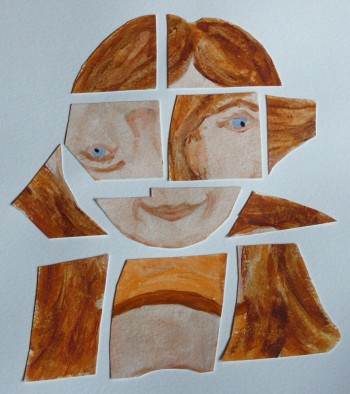
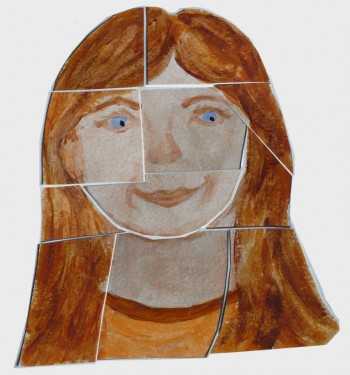
This art activity will take two sessions to finish. Once the paintings are finished, they need to dry before they are cut up into “Picasso Portraits”. (This second session will not take long.) In this lesson, students learn to draw faces, learn about one of Picasso’s styles: cubism, and learn to tint colors with white and to shade colors with black.
Objectives:
- Learn about different artists.
- Imitate work of different artists
- Learn something about drawing faces: placement: eyes bottom of first third, nose in middle of second third with ears on outside at the centre, mouth at top of bottom third; face shapes: round, oval, heart-shape
- Learn to add black to make a shade.
- Learn to add white to make a tint.
Materials:
- Tempura or watercolour paints in blue, brown, yellow, orange, white, black, red, purple, green.
- For each student: jar of water, paintbrush, 2 different size sheets of white paper (8 1/2″ X 11″ and 11″ X 18″), scissors, pencil, glue, ruler (mirrors are needed if doing self-portraits). (I use heavier watercolor paper for the smaller sheet to do the painting. The mounting sheet can be of lighter quality.)
- towels and bin/sink of soapy water for cleanup
- write-up on Picasso for the bulletin board when the art is displayed: “Pablo Picasso 1881-1973 Cubism. He was raised in Spain, then lived in Paris. He was very talented and by 19 he was a trained, professional painter. He had a Blue Period where he painted with shades of blue (sad time), then he had a Rose Period (happier), then he began painting pictures that looked like puzzles with pieces mixed up. He also invented collage where things were stuck to his paintings. He painted pictures where body parts were in square or cube shapes, with maybe eyes facing right and nose facing left, so that all sides were shown at once, not a normal view.”
- title for bulletin board, on paper: “Picasso Portraits by Grade 3, inspired by Pablo Picasso”.
- drawing notebook with blank pages
- blackboard and chalk

Method:
- Practise drawing the face with students, one feature at a time (friend or themselves) in their drawing notebook. Have students practise drawing circles, ovals (like eggs with small end for chin), and rounded hearts. Show them how to divide the face into 3 sections with light pencil lines. Have them look at a friend’s face shape, eye shape, nose, mouth and ears. (You can use mirrors for self-portraits.) Then have them draw the eyes at the bottom of the first third, the nose in the middle of the second third, and the mouth at the top of the bottom third. The ears are drawn on the outside of the centre section. (As long as you do one thing at a time, students can do this easily. I do the same drawing on the blackboard to demonstrate each step.)
- Next, students use pencils to lightly re-draw their face or friend’s face on the 8 1/2″ X 11″ white paper. When it is done, it can be painted. (Easiest to paint if pencil is darker on final sketch.)
- Show students how to use the white paint to make a tint of another color. For example, if someone’s hair is light brown, show them how to add white to brown to make a lighter tint. If the eyebrows are a darker shade of brown than you have paint, add some black paint to make a brown that is a shade darker.
- When the portraits are finished, they need to dry. Cut carefully all along the outside painted edge. Throw away the unpainted white paper you have cut off. Next, students will then use a ruler and pencil to lightly draw square or cube shapes around one eye, one eye and nose, then separate the top third of the head into two pieces. The ears can each be in another square. Cut carefully on the lines so that the picture is now is pieces. You can cut the shape along the chin so that the straight edges are above on the cheeks. Arrange the pieces on the larger white paper so that it still looks sort of like a mixed-up face, but still recognizable. Show students how to turn the squares upside down or sideways, leaving white space between the pieces. When it’s how you like it, glue the pieces onto the 11″ X 18″ piece of white paper.
- With a thin black marker, have the artist sign their name in the bottom right-hand corner of their masterpiece.
- Post the Picasso Portraits on the bulletin board with the writeup of Pablo Picasso, your objectives (listed above) for parents to see, as well as a title “Picasso Portraits by Grade 3, inspired by Pablo Picasso”. What beautiful masterpieces!
Tags: drawing faces, drawing notebook, Picasso imitation, watercolor painting
